Want to track your website’s performance easily without needing constant tech help? Google Tag Manager (GTM) is your solution. This guide makes adding GTM to your WordPress site simple, clear, and fast—perfect for busy entrepreneurs.
What Exactly is Google Tag Manager?
Google Tag Manager is a tool that organizes all your website tracking scripts in one easy-to-use dashboard. Instead of dealing with multiple code snippets, you manage everything in a single place. For entrepreneurs, GTM:
Saves valuable time (no more waiting for your developer)
Reduces technical errors (less code means fewer mistakes)
Provides accurate insights into visitor behavior
Accelerates decision-making with better data
Easy Steps to Install Google Tag Manager on WordPress
Adding Google Tag Manager to your WordPress website is straightforward. Follow these simple, non-technical steps:
Create a Google Tag Manager Account: Sign up for a Google Tag Manager account if you don’t already have one. This will allow you to manage all your tags in one place.
Install the Code Snippet: Once your account is set up, Google Tag Manager will provide you with a code snippet. You need to add this snippet to your WordPress website. You can do this manually by editing your theme’s header.php file or by using a plugin for easier code management.
Configure Your Tags: After installing the code snippet, you can start configuring your tags. This includes setting up tags for Google Analytics, conversion tracking, and other marketing tools.
By following these steps, you can efficiently manage and track your website’s performance.
Step 1: Create Your Google Tag Manager Account
Visit the Google Tag Manager website
Sign in using your Google account (Gmail or Google Workspace).
Click “Create Account”, enter your business name and select your country.

Under “Container Setup,” enter your website URL, select “Web,” then click “Create”.
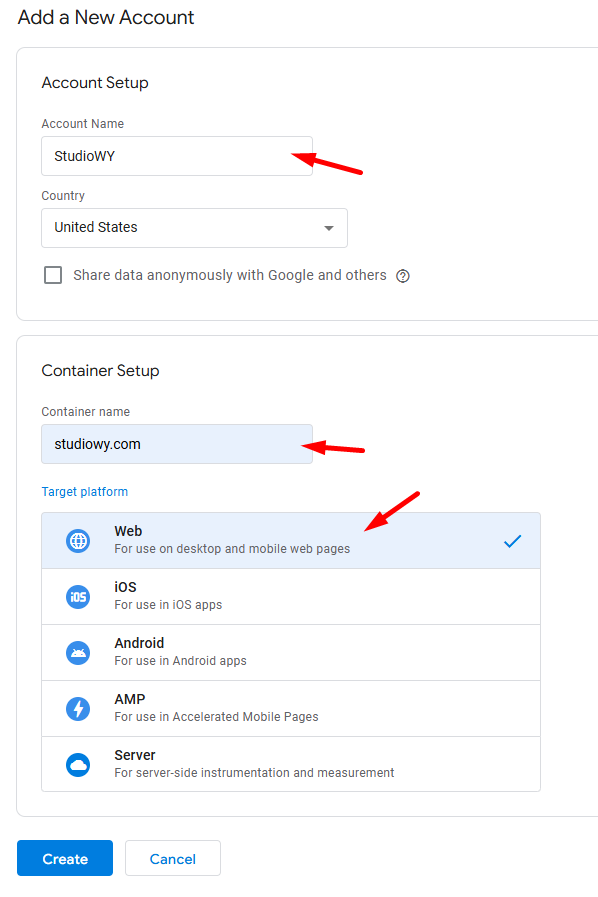
Agree to Google’s terms.
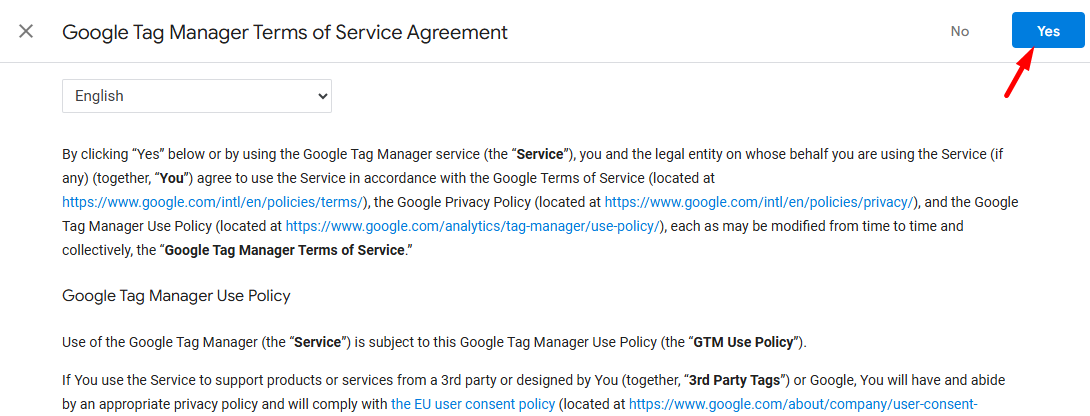
Tip
Clearly name your account and container (e.g., your company’s name or your website URL) to stay organized.
Step 2: Log into Your WordPress Dashboard
Visit your WordPress admin page (usually yourwebsite.com/wp-admin).
Once logged in, perform a quick backup. If you’re unsure, use a plugin like “UpdraftPlus” to easily create a backup.
Why Backup?
Backups protect your website in case something goes wrong.
Step 3: Install a Simple Plugin to Insert GTM Code

From your WordPress dashboard, click Plugins → Add New.
Search for “Insert Headers and Footers” or “WPCode”.
Click “Install Now”, then “Activate”.
Step 4: Copy Your Google Tag Manager Code
Return to your Google Tag Manager account.
Click on your container name to view installation instructions.
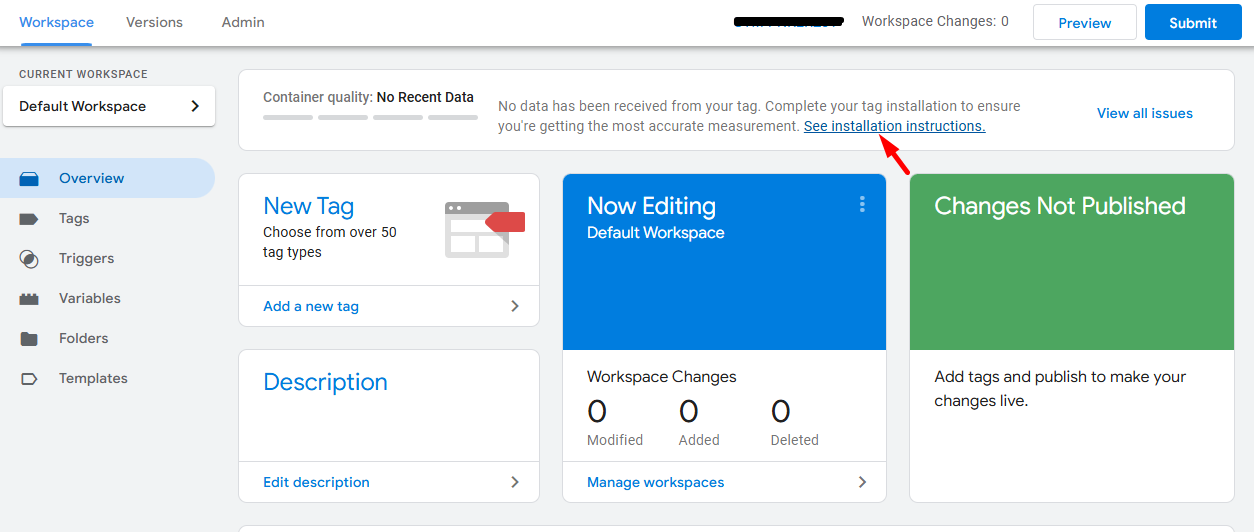
You’ll see two separate code snippets:
Header snippet (to place in the header section)
Body snippet (to place immediately after the opening <body> tag)
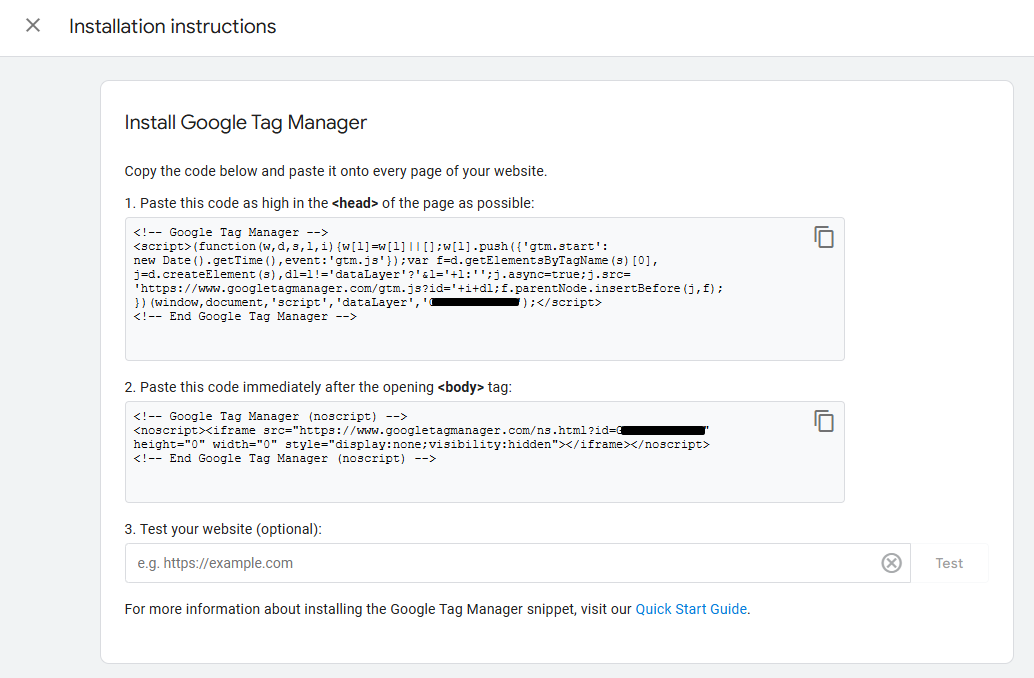
Copy both snippets separately.
Step 5: Add Google Tag Manager Code to Your WordPress Website
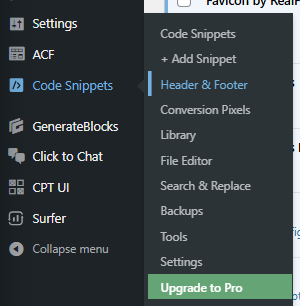
In WordPress, go to Code Snippets → Header & Footer.
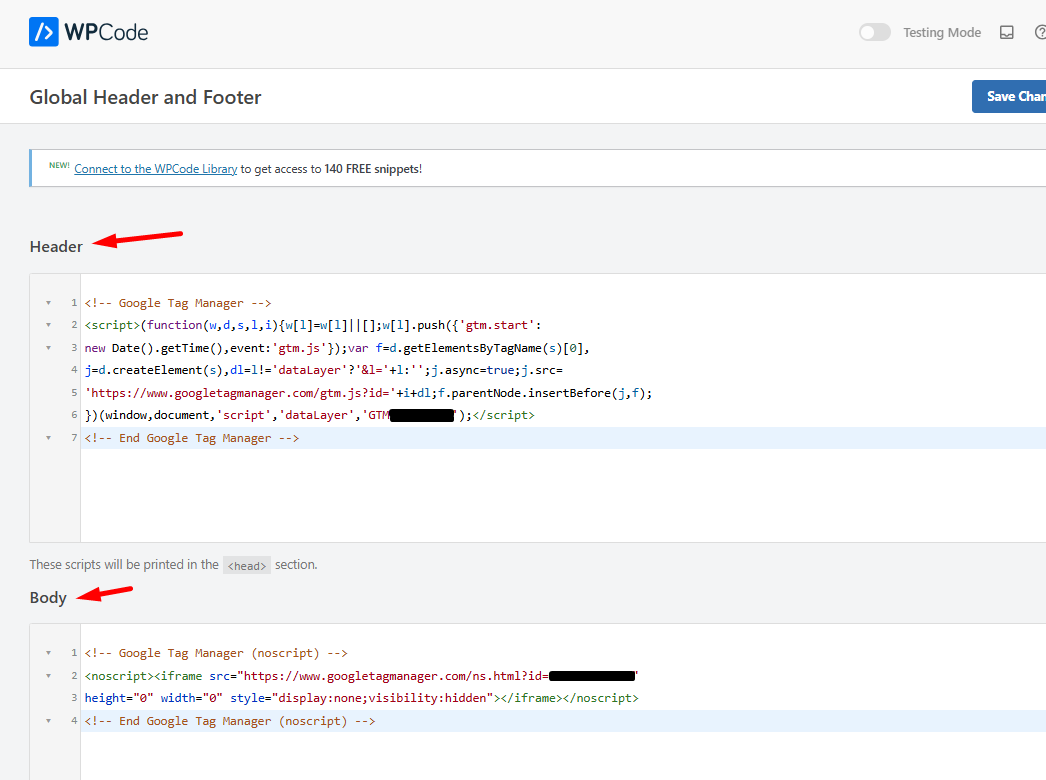
Paste the header snippet into the header section.
Paste the body snippet into the body section.
Click “Save”.
Step 6: Verify Everything Works
Go back to Google Tag Manager.
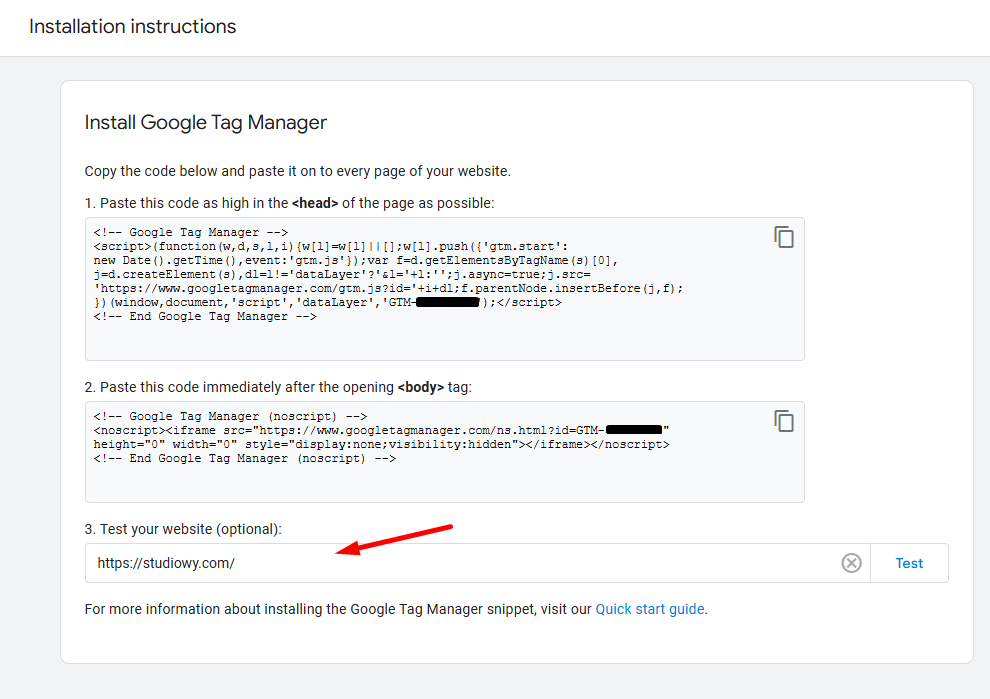
In the “Install Google Tag Manager” section, scroll to Step 3: Test your website (optional).
Enter your website URL (e.g., https://studiowy.com/) in the test field.
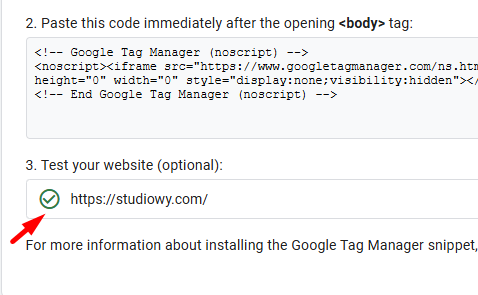
When you see a green checkmark icon (✅) next to your URL, it means Google Tag Manager has successfully detected that it’s installed on your website.
Tip
Sometimes it takes a few minutes for changes to reflect due to browser or server cache. If you don’t see the green checkmark right away, wait a little, clear your cache, or try testing again later. Patience pays off! 😊
Business Benefits of Using Google Tag Manager
Save Money: No need to hire a developer for every tracking change
Move Faster: Implement marketing tags immediately without waiting
Reduce Errors: Less chance of breaking your website with direct code edits
Gain Insights: Track customer behavior more accurately
Future-Proof: Add new marketing tools easily as your business grows
Quick Answers to Common Questions
Q: Will Google Tag Manager slow down my website?
A: GTM is designed to load efficiently and typically has minimal impact on site speed when properly implemented.
Q: What if I make a mistake during installation?
A: That’s why we recommend using a plugin and creating a backup first. If something goes wrong, you can easily revert changes.
Q: Do I still need Google Analytics if I have GTM?
A: Yes. GTM is a container for your tracking codes, while Google Analytics is the actual tracking tool. You’ll use GTM to implement Google Analytics.
Q: Can I add Facebook Pixel or other tracking tools with GTM?
A: Absolutely! Once GTM is installed, you can add virtually any tracking tool without touching your website code again.
Q: How do I connect Google Analytics to my WordPress site?
The simplest and most convenient way to connect Google Analytics to your WordPress site is by using Google Tag Manager (GTM). Follow these easy steps:
Sign up for Google Analytics at analytics.google.com. Set up a new property to obtain your Measurement ID.
Install Google Tag Manager (GTM) on your WordPress site (see the Quick & Simple Guide above).
Add your Google Analytics tracking inside your GTM dashboard:
Go to your GTM workspace and click “Add a new tag.”
Select “Google Analytics: GA4 Configuration” as your tag type.
Enter your Analytics Measurement ID and set the trigger to “All Pages.”
Click “Save” and “Publish.”
You’re now connected! GTM handles everything neatly in one place, keeping things simple and efficient.
Need Expert Help with Your Google Tag Manager or Website Analytics?
If you’d rather focus on growing your business instead of dealing with technical setups, I’m here to support you with two straightforward options:
1. Work with Me Directly
Let me handle your Google Tag Manager and website analytics setup so you can focus on running your business smoothly.
Here’s how I can help:
✅ Set up and configure Google Tag Manager tailored to your business
✅ Integrate Google Analytics to accurately track visitor behavior
👉 Simply visit my Contact page—I’ll take care of everything from start to finish, ensuring your tracking and analytics are working flawlessly.
2. Join a Supportive Entrepreneur Community
Want to handle things yourself but need some guidance? Join the Wealthy Affiliate Community, where entrepreneurs share valuable insights and practical tips on:
✅ Google Tag Manager setup
✅ WordPress tracking tools
✅ Improving your website performance
✅ Real-time support from fellow business owners
It’s an ideal place to build skills, gain insights, and grow alongside like-minded entrepreneurs.